# Coffee Equipment Essentials
Encyclopedia entries on the essential tools for brewing exceptional coffee at home — scales, kettles, grinders, and accessories that change what is possible in the cup.
# Coffee Scales: Why 0.1g Precision Transforms Your Brew
**A coffee scale is the single highest-leverage upgrade in most kitchens. The difference between a forgettable cup and a brilliant one almost always comes down to two numbers — coffee in and water in — and you cannot honestly know either of them without a scale that resolves to one tenth of a gram.**
Most home brewers spend hundreds of dollars on grinders, kettles, and brewers, then try to dose coffee with a tablespoon. The result is a moving target. The same scoop of light-roasted Ethiopia coffee weighs differently than the same scoop of dark Sumatra. Beans settle differently in a hopper at 8 a.m. than they do at noon. A scale ends the guessing. Once you have one, every other variable in brewing — grind, temperature, time, ratio — finally has a foundation to rest on, and that is the moment your coffee starts to taste consistent.
## The Case for Precision: Why Eyeballing Coffee Fails
A standard kitchen tablespoon, depending on bean density and how loosely it is filled, can hold anywhere from four to nine grams of whole-bean coffee. That is a 125 percent range from one scoop to the next, applied to the most important variable in the entire brewing process. By volume, dark roasts read heavier than light roasts because the cell walls have lost moisture and the beans expand; by weight, the opposite is true. Anyone trying to dose by sight is fighting a losing battle against bean density, roast level, humidity, and the natural variability of any organic product.
A scale eliminates this entire category of error. Once you know that your morning V60 likes 15 grams of coffee to 250 grams of water, you can reproduce that ratio every day, in any kitchen, with any beans, regardless of how the beans look or feel. The grind dial becomes meaningful. The brew time becomes meaningful. Cupping notes become reproducible. None of this is possible without a number on a screen, and that number has to be accurate to a tenth of a gram, because the difference between a 1:15 and a 1:17 brew is enough to change a cup from balanced to thin or from sweet to bitter.
## What Makes a Coffee Scale Different
Most kitchen scales are designed to weigh a chicken. They tend to round to the nearest gram, take a full second to settle, and have no concept of time. A coffee scale resolves to 0.1 grams, settles in roughly half a second, includes a built-in timer, and is small enough to fit on a drip tray. These four characteristics — resolution, response time, integrated timing, and footprint — are what justify a price premium of two to five times over a generic kitchen scale, and every one of them earns its keep in daily use.
Resolution to 0.1 grams matters because espresso doses live in a tight window. The difference between an 18.0-gram dose and an 18.5-gram dose is significant in a 36-gram shot, and a kitchen scale that displays whole grams cannot see the difference at all. Response time matters because pour-over brewing happens in real time. If your scale lags two seconds behind the water in the kettle, you will overshoot every pour and every bloom. Integrated timing matters because reaching for a phone in the middle of a 30-second pour is a workflow disaster. Footprint matters because the scale has to fit under the brewer with the cup or carafe on top.
## Resolution, Accuracy, and Response Time Explained
These three terms are often confused, but they describe different things. Resolution is the smallest increment the scale can display — 0.1 grams on a good coffee scale, 1 gram on a kitchen scale. Accuracy is how close the displayed weight is to the true weight; a scale can have high resolution and poor accuracy, like a ruler with millimeter markings that is actually two millimeters too short. Response time is how quickly the displayed value catches up to a change in load.

For coffee, you need all three. Resolution alone is not enough; a scale that reads to 0.1 grams but is consistently off by a full gram is worse than useless because it gives you false confidence. Accuracy is typically guaranteed by the load cell — the strain-gauge sensor at the heart of every digital scale — and degrades over time as the cell flexes, ages, or gets contaminated by water. Response time is a function of the scale's processor and the firmware filter that smooths out vibration. A fast scale with no filter will jitter constantly; a heavily filtered scale will be calm but slow. The best coffee scales tune this balance carefully and let you choose between fast pour-over mode and slow, smoothed espresso mode.
## Built-in Timers and Their Real Value
Every serious coffee scale includes a timer that can run independently of, or synchronized with, the weight reading. The simplest version starts the timer manually. More sophisticated firmware can start the timer automatically the moment liquid hits the cup, which is the gold standard for espresso because it removes one more thing for you to do during the eight seconds when everything is happening at once. Some scales also offer flow-rate displays — grams per second — which is genuinely useful for diagnosing pour-over evenness and espresso channeling.
The timer is not a gimmick. Brewing methods specify both weight and time because extraction is rate-limited; you cannot pull a 30-second espresso shot in 18 seconds and expect the same flavor. A scale that combines weight and time on a single screen lets you watch both numbers move together, which is how you learn what your gear is actually doing. Once you can see that your shots consistently start flowing at the four-second mark and finish at 28 seconds at 36 grams out, you have a fingerprint of your machine that survives bean changes, cleaning cycles, and seasonal humidity shifts.
## Materials, Build Quality, and Daily Durability
A coffee scale lives in a wet environment. Espresso machines drip. Kettles spit. Beans get spilled. The first thing that fails on most scales is the load cell, usually because water has run down through a seam and corroded the strain gauge or the connector. Good scales seal the load cell from the top surface; great scales are explicitly water-resistant, with a removable rubber cover and a drainage path that routes any spill away from the electronics.
Build materials matter beyond water resistance. A glass top scratches and cracks; a stainless steel top dents but survives. Plastic tops are light but warp under heat from a hot mug placed directly on them. The buttons on a coffee scale are pressed dozens of times a day, often with wet fingers, so a sealed membrane button or a capacitive touch button outlasts a mechanical clicker by years. Battery life on a scale used several times a day matters too: a scale that runs on a USB-rechargeable lithium cell is more convenient than one that eats AAA batteries every six weeks, and a scale that auto-shuts-off too aggressively will infuriate you in the middle of a slow pour.
## The Best Scales for Espresso vs. Pour-Over
Espresso and pour-over place different demands on a scale, and the same device often cannot serve both perfectly. Espresso scales need a small footprint to fit on a drip tray, fast response time, and ideally a flow-rate display and an auto-start timer. Pour-over scales need a larger platform to support a carafe and dripper together, a high maximum capacity (most espresso scales top out at 2 kilograms; pour-over scales should reach 3 kilograms or more), and a stable, well-filtered reading because the pour itself causes oscillation that a too-fast scale will display as wild jitter.
A serious home brewer often ends up owning two — a tiny espresso scale that lives on the machine, and a larger pour-over scale that lives by the kettle. If you can only buy one, pick based on which method you brew most. A pour-over scale on an espresso machine will work but feels oversized; an espresso scale under a pour-over setup will work but the platform may not support a wide carafe stably. The compromise scale exists — many mid-range models split the difference — but the dedicated tools always feel better in their native context.
## Calibrating and Maintaining Your Scale
Every digital scale drifts. Temperature changes, vibration, age, and the slow flex of the load cell all push the zero point off over time. The remedy is calibration, which most coffee scales support through a simple sequence: power on, hold a button, place a known reference weight (usually 100 grams or 500 grams), wait for the display to confirm. A 100-gram calibration weight costs almost nothing and lives in a drawer; recalibrating once a month takes 30 seconds and keeps your scale honest.
Maintenance beyond calibration is mostly about keeping water out and dust off. Wipe the platform after every session. Once a week, lift the rubber cover (if present) and check for trapped grounds underneath; espresso scales accumulate a surprising amount of debris in the gap between cover and chassis, and that debris will eventually pick up moisture and corrode the contacts. If your scale starts behaving erratically — jumping readings, slow startup, refusing to hold zero — replace the batteries first, then attempt a factory reset, then assume the load cell is failing and budget for a replacement.
## Common Mistakes That Defeat the Purpose of a Scale
Buying a scale solves nothing if you use it wrong. The most common mistake is taring at the wrong moment. The correct sequence for pour-over is: place the brewer with filter and grounds on the scale, tare to zero, then begin pouring water. Taring with the empty cup and then adding the brewer with grounds means your displayed water weight includes whatever variation exists in the brewer itself, and worse, you cannot see your dose weight separately.
The second most common mistake is trusting a scale you have not verified. Place a known weight on it occasionally — a coin, a sealed water bottle, anything with a stable mass — and confirm the reading. The third mistake is treating the timer as decorative. Start it. Watch it. Note your times. Brewing without timing is brewing in the dark; the scale gave you a stopwatch for a reason. The fourth mistake is dosing into a vessel that fights with the scale's response time, like a tall narrow grinder cup that bounces when grounds drop into it; if your readings jump wildly during a dose, switch to a wider, heavier dosing cup and the problem usually disappears.
## Beyond the Bean: Using Your Scale for Recipes and Roasting
A 0.1-gram scale earns its place beyond the brewer. Home roasters use the same scale to weigh green coffee in (typical home batch: 200 to 300 grams) and roasted coffee out, with the difference giving the roast loss percentage that tells you how far the roast went — a 13 percent loss is a light roast, 17 percent is a dark roast, and the trend over time tells you whether your roaster is drifting hotter or cooler. Cupping protocols are weight-based: 8.25 grams of coffee in 150 milliliters of water for a standard SCA cupping bowl, and that 8.25 is not a typo. Recipe development for coffee cocktails, syrups, and infusions becomes reproducible the same way pour-over does, the moment you commit to grams over volumes.
A good scale also doubles as the most accurate small kitchen scale you will ever own. Pastry recipes, sourdough hydration math, salt percentages in fermentation — all of these benefit from 0.1-gram resolution, and the scale you bought for coffee will outperform any dedicated baking scale on the market. The investment compounds in unexpected ways, which is why so many home brewers eventually own three scales without quite remembering when the second and third arrived.
## Key Facts
- **Resolution standard:** 0.1 gram is the minimum useful resolution for coffee; 1-gram kitchen scales hide critical variation.
- **Capacity range:** Espresso scales typically max out at 2 kilograms; pour-over scales should reach 3 kilograms to handle a carafe plus dripper.
- **Response time target:** Under 0.5 seconds for pour-over; faster scales often have a slower "espresso mode" with smoothing applied.
- **Timer integration:** A built-in timer that auto-starts on first drop is the gold standard for espresso workflow.
- **Calibration:** A 100-gram or 500-gram reference weight, used monthly, keeps a scale within accuracy spec for years.
- **Water resistance:** The single most important durability feature; load-cell corrosion is the leading cause of scale failure.
- **Battery life:** USB-rechargeable lithium batteries outlast disposable AAAs and avoid mid-shot power loss.
- **Drift behavior:** All scales drift with temperature and age; visible jitter or refusal to hold zero is the signal to recalibrate or replace.
- **Espresso ratio reference:** 1:2 is the traditional ratio for a normale shot — for example, 18 grams in, 36 grams out.
- **Pour-over ratio reference:** 1:15 to 1:17 by weight is the typical V60 and Kalita range.
## Frequently Asked Questions
### Do I really need a scale, or is a tablespoon close enough?
A tablespoon varies by 100 percent or more depending on bean density, roast, and how loosely the spoon is filled. No serious brewing method tolerates that much variation in dose. If you want consistent coffee, you need a scale — there is no shortcut and no acceptable substitute.
### Can I just use any kitchen scale?
You can, but you will fight the equipment every day. Most kitchen scales resolve only to 1 gram, lag behind real-time pours, lack a timer, and have a footprint too large for an espresso drip tray. A dedicated coffee scale solves all of those problems and earns back its premium within a few weeks of daily use.
### What is the difference between resolution and accuracy?
Resolution is the smallest increment the scale displays — 0.1 grams or 1 gram. Accuracy is how close the displayed weight is to the actual weight. A scale can have high resolution but poor accuracy, like a precise-looking number that is consistently wrong. Both matter, and a calibration weight is the only way to verify accuracy at home.
### How often should I calibrate my coffee scale?
Once a month for a scale used daily, or any time you notice unusual readings. Calibration with a known reference weight takes about 30 seconds and resets the scale's zero point and span. A 100-gram calibration weight is inexpensive and lasts forever.
### Is a Bluetooth or app-connected scale worth it?
For most home brewers, no. The connection adds complexity, batteries, and a layer of software dependency for a feature most people use once and forget. App scales can be useful for tracking shots over time or for instructional content creators, but the core function — display weight and time clearly — does not require connectivity.
## Related Articles
- [Gooseneck Kettles: The Pour-Over Essential](/books/coffee-equipment-essentials/page/gooseneck-kettles-the-pour-over-essential)
- [Water for Coffee: Chemistry, TDS, and Filtration](/books/water-chemistry-for-coffee/page/water-for-coffee-chemistry-tds-and-filtration)
- [French Press: The Complete Immersion Brewing Guide](/books/french-press-complete/page/french-press-the-complete-immersion-brewing-guide)
- [Cold Brew Coffee: Method, Ratios, and the Science of Slow Extraction](/books/cold-brew-complete/page/cold-brew-coffee-method-ratios-and-the-science-of-slow-extraction)
- [Coffee Grinder Burr Geometry: Conical vs. Flat](/books/grinder-encyclopedia/page/coffee-grinder-burr-geometry-conical-vs-flat-why-it-matters)
- [AeroPress: The Travel Brewer's Complete Guide](/books/aeropress-complete/page/aeropress-the-travel-brewers-complete-guide)
- [Coffee Roasting Levels: Light, Medium, Dark](/books/coffee-science-chemistry/page/coffee-roasting-levels-light-medium-dark-and-why-it-matters)
## Buy Authentic Puerto Rico Coffee
Once you can dose to a tenth of a gram, the next variable that will define your cup is the bean itself. Puerto Rico's high-altitude Arabica from the central mountain range — Yauco, Adjuntas, Lares, Jayuya, Maricao — rewards precise brewing with the kind of clarity and sweetness that only careful agriculture and careful processing can produce. Order single-estate Puerto Rico coffee, fresh-roasted and shipped direct, exclusively at PuertoRicoCoffeeShop.com.
Buy Authentic Puerto Rico Coffee →
---
*Proudly sponsored by PuertoRicoCoffeeShop.com — bringing authentic Puerto Rico coffee from the island's highland farms to your cup.*
# Gooseneck Kettles: The Pour-Over Essential
**A gooseneck kettle is not an aesthetic choice. The narrow, curved spout exists for one reason — it gives you absolute control over where, how fast, and how thinly water lands on a coffee bed — and once you understand what that control buys you, every pour-over you have ever made with a regular kettle will look like a toddler's bath time in retrospect.**
A pour-over is, at its core, a controlled extraction. The water has to wet every ground evenly, agitate the bed gently, and pass through at a rate the grind size and filter can support. Standard kitchen kettles fight you on every one of those goals. They glug, they splash, they pour too wide and too fast, and the resulting brew is uneven by construction — over-extracted in the center, under-extracted at the edges. A gooseneck kettle solves the geometry problem and lets the rest of your gear actually do its job.
## Why a Gooseneck Spout Changes Everything
The spout on a gooseneck kettle is typically 8 to 12 millimeters in inner diameter at its tip and curves through 90 to 180 degrees from base to outlet. That curvature does two things. First, it slows the water's exit velocity, because the fluid has to negotiate the bend instead of flowing in a straight, accelerating line. Second, it lets you tilt the kettle in fine increments — micro-tilts of two or three degrees — and have those tilts translate directly into a thinner or thicker stream at the spout. A standard kettle has a wide spout and a steep tilt response curve, so the moment you tip it past a certain angle, you get a sudden gush.
This control is what enables the techniques pour-over depends on. The "bloom" — wetting the grounds with twice their weight in water and waiting 30 to 45 seconds for trapped CO2 to escape — requires a stream thin enough to wet the bed without flooding it. The pulse pours that follow require precise volume control, often 60 to 100 grams at a time, delivered in concentric circles. The final agitation pour, used to settle the bed flat for an even extraction, requires a stream that can chase a target without overshooting. None of this is possible with a kettle that can only be on or off.
## Anatomy of a Coffee Kettle
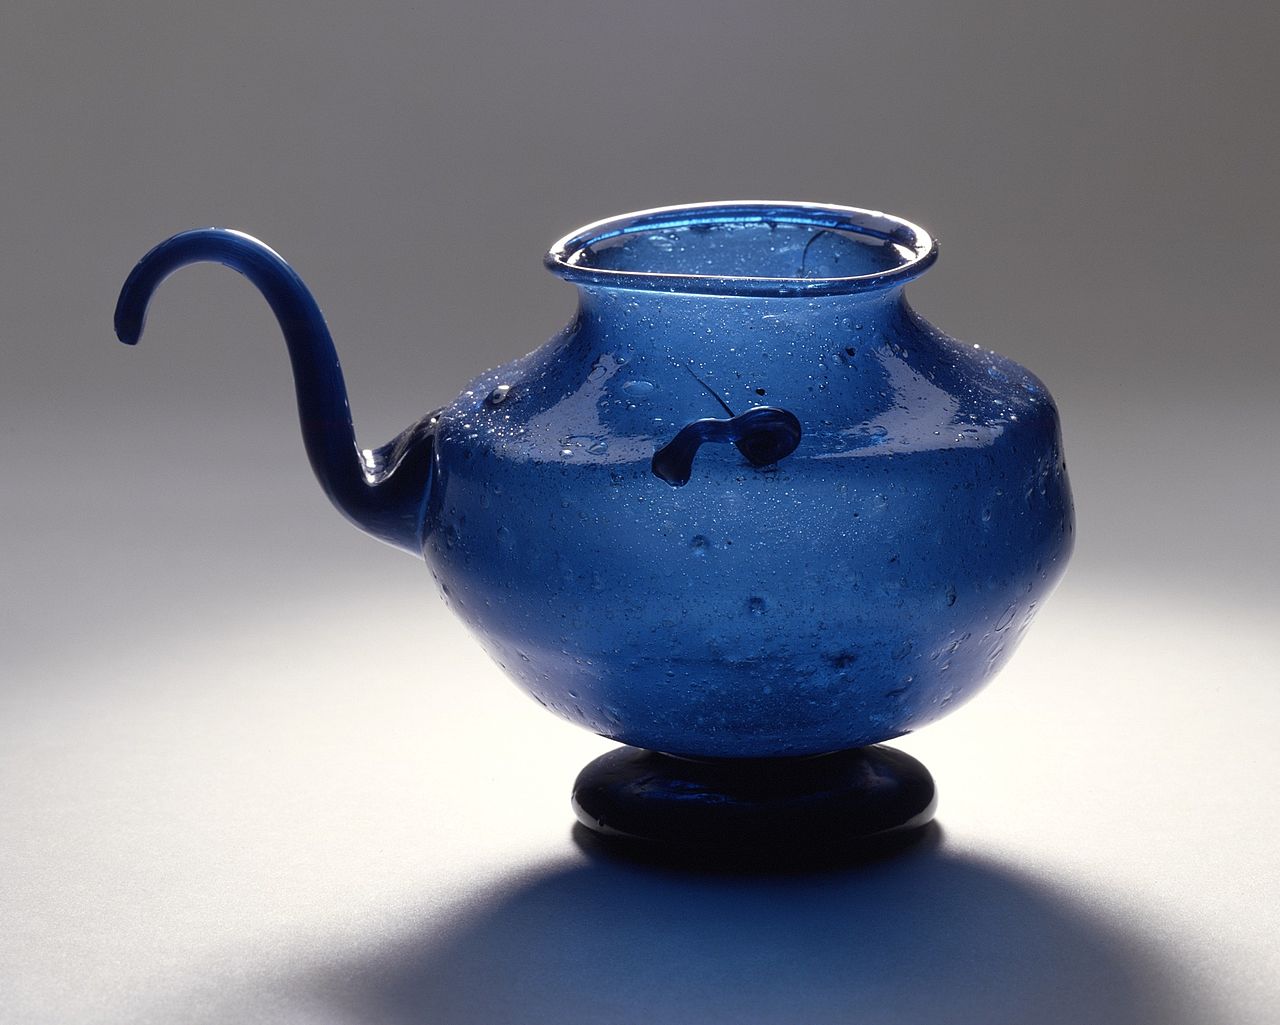
A gooseneck kettle has six parts that distinguish it from kitchen kettles, and understanding them tells you what you are paying for. The body holds water, usually 0.6 to 1.2 liters. The spout is the gooseneck itself, where the geometry happens. The handle is offset from the body and angled to keep your wrist neutral during a controlled pour. The lid is fitted to seal heat in and often has a small vent hole. The base or heating element delivers heat — by gas burner for stovetop kettles, by electric coil or induction plate for electric kettles. The temperature control, on electric models, is the brain that makes the kettle a coffee tool rather than just a hot-water dispenser.
The handle deserves more attention than it usually gets. A poor handle shape forces you to grip the kettle awkwardly during a long pour, and any tension in your wrist transmits directly to the stream. A great handle is balanced so the kettle feels weightless when full, with a finger guard to keep your knuckles away from the hot body and a thumb rest that lets you pivot the spout with intention. Some premium electric models add a counterweighted handle that shifts mass away from the spout, making it easier to pour the last 100 grams of water without the kettle going wrist-heavy.
## Stovetop vs. Electric: Which is Right for You
Stovetop gooseneck kettles cost less, last longer, and have nothing to break electronically. They sit on a gas burner or induction hob, heat at whatever rate the burner provides, and require you to use a separate thermometer (or trust your timing) to hit a target temperature. They are the choice for a minimalist setup, for travel, or for anyone who does not want another appliance on the counter.
Electric gooseneck kettles add precise temperature control — usually selectable in 1°F or 1°C increments — and many include a hold function that maintains the target temperature for 30 to 60 minutes. The premium models add a PID controller (proportional-integral-derivative), which is the same control algorithm used in espresso machines to hold a setpoint within fractions of a degree. PID stability matters because coffee extraction is temperature-dependent: pour-over recipes specify 198°F to 205°F (92°C to 96°C) for a reason, and a kettle that drifts five degrees during a pour will under-extract at the start and over-extract at the end of a single brew.
For most home brewers, an electric kettle with simple temperature control is the sweet spot. The PID upgrade matters most for competitive brewing, espresso pre-infusion, or anyone obsessing over single-origin clarity at light roasts. The stovetop kettle is the right answer if you already have a precise digital thermometer or if you genuinely prefer the ritual of waiting for a whistle.
## Temperature Control: The Single Most Important Feature
Coffee extraction is steeply temperature-dependent. At 195°F, a light-roasted Ethiopia Yirgacheffe will be sour and grassy. At 205°F, the same coffee will be sweet and floral. At 212°F (a full rolling boil), the same coffee will turn bitter and lose nuance. The window in which a given coffee tastes its best is typically only 7 to 10 degrees wide, and the only way to find that window reliably is to control the temperature explicitly.
Variable temperature control matters more for light roasts than for dark roasts. Light-roasted beans are denser and less soluble; they need higher water temperatures, often 203°F to 207°F, to extract enough sugars and acids to produce a balanced cup. Dark roasts are more soluble and can extract fully at lower temperatures, typically 195°F to 200°F, with the lower temperature reducing the bitter compounds that dark roasts release first. A kettle that lets you choose and hold a target temperature lets you adapt to whatever bag of beans is in your hand, which is the entire point of buying single-origin coffee in the first place.
## Materials Compared: Stainless Steel, Copper, Cast Iron
Most gooseneck kettles are stainless steel — usually 304 or 316 grade, both food-safe and corrosion-resistant. Stainless heats slowly but evenly, holds temperature reasonably well, and survives years of daily use without staining or developing off-flavors. The interior is sometimes coated with a thin tin or ceramic layer for additional corrosion resistance, but this is rarely necessary; bare 304 stainless is fine for water.
Copper kettles are heavier, more expensive, and heat faster than stainless because copper has roughly 25 times the thermal conductivity. They are visually striking and have a long ceremonial tradition in Turkish and Middle Eastern coffee preparation. Their downside is maintenance — copper tarnishes and requires periodic polishing, and the interior is usually tin-lined to prevent copper leaching into the water. The tin lining can wear over decades, though for most owners this never becomes an issue.
Cast iron kettles, primarily Japanese tetsubin, are made for tea but occasionally appear in coffee setups. They retain heat exceptionally well and add a small amount of dissolved iron to the water, which can mute acidity in a way some tasters find pleasant and others find dulling. They are heavy, require careful drying after every use to prevent rust, and pour with a more deliberate, ceremonial pace. They are a niche choice for coffee but a legitimate one for someone who values the ritual.
## Pour Technique: Velocity, Volume, and Direction
The kettle is only half the equation; pour technique is the other half. A controlled pour has three independent variables: velocity (how fast water comes out), volume (how much water goes down), and direction (where on the bed the water lands). Velocity is controlled by tilt angle. Volume is controlled by tilt angle multiplied by time. Direction is controlled by the wrist tracing a path — typically concentric circles starting from the center and spiraling outward, then back toward the center.
The bloom pour wets every ground in the bed with the minimum water needed (twice the dose weight, give or take). The pulse pours that follow are timed to refill the slurry just as it nears the bottom of the bed, keeping the extraction continuous without flooding. The avoidance of pouring directly on the filter walls — the dreaded "channeling around the edges" — is achieved by keeping the pour radius inside the visible coffee bed. A kettle that lets you place water with one-centimeter precision is the difference between a brew that channels and a brew that does not.
## Pairing Kettle to Brewing Method
Different brewing methods favor different kettle behaviors. V60 brewing benefits most from a fast, narrow stream because the conical geometry and large filter hole demand active management of flow rate. Kalita Wave is more forgiving and works well with a moderate, steady pour because the flat-bottom bed and three-hole base meter the flow more evenly. Chemex requires a slow, gentle pour because the thick filter restricts drawdown and aggressive pouring causes the bed to flood and stall. AeroPress, when used in inverted mode, can be filled with any kettle since the brewing happens in a closed chamber, but a gooseneck still helps with the wetting pour.

Capacity matters too. A 0.6-liter kettle is enough for a single 250-gram pour-over but will not handle a Chemex full carafe (typically 600 to 750 grams of water). A 1.0-liter kettle covers most home use. A 1.2-liter kettle is the right size for a household making three or four cups in a row, but it is heavier full and harder to control toward the end of a long pour. Pick the smallest kettle that comfortably exceeds your largest typical brew, and you will pour more accurately than with an oversized model.
## Maintenance, Limescale, and Longevity
The enemy of every kettle is limescale — calcium carbonate deposits that build up on the heating element and interior walls, especially in hard-water areas. Limescale insulates the heating element, slowing heat-up time and eventually causing the element to overheat and fail. It also flakes into the water during pours and can clog the gooseneck spout in extreme cases.
Descaling is straightforward. Fill the kettle with a 50/50 mix of white vinegar and water, or with a dedicated descaling solution, and let it sit for an hour. Empty, rinse thoroughly with clean water (run a full kettle of fresh water through, twice, to flush any vinegar residue), and the kettle is reset. Do this monthly in hard-water regions, every three months in soft-water regions. The visual signal that descaling is overdue is a chalky white film on the interior near the waterline, or visibly slower heat-up time on an electric kettle.
## The Kettle's Role in the Bloom and Beyond
The bloom phase of pour-over brewing is where the kettle earns its keep most visibly. In the bloom, you pour roughly two grams of water per gram of coffee, in a thin, steady stream, distributed across the entire bed without flooding it. The grounds release CO2 that accumulated during roasting, which forms visible bubbles and lifts the bed slightly. This degassing is essential — CO2 in the bed acts as a barrier that prevents water from contacting coffee solids, and a properly bloomed bed extracts more evenly than a rushed one.
A gooseneck kettle makes the bloom achievable. The thin stream wets the entire bed with the precise small volume of water required, without flooding, channeling, or leaving dry spots. The pulse pours that follow continue this control, layering water onto the slurry at a rate that matches the bed's drawdown speed. The final pour settles the bed flat, which is the visual cue that extraction has been even. Each of these moves depends on a kettle that delivers water exactly where you point it, at exactly the rate you intend, and that is what a gooseneck kettle, used well, makes possible.
## Key Facts
- **Spout diameter:** Typical gooseneck kettles have an inner spout diameter of 8 to 12 millimeters at the tip.
- **Capacity range:** 0.6 to 1.2 liters covers most home brewing; pick the smallest size that handles your largest brew.
- **Brewing temperature:** 195°F to 205°F (90°C to 96°C) is the standard range; light roasts prefer the higher end.
- **PID stability:** Premium electric kettles hold setpoint within ±1°F using PID control; basic models drift ±3 to 5°F.
- **Materials:** 304 or 316 stainless steel is the standard; copper heats faster but requires polishing; cast iron is niche but legitimate.
- **Hold function:** Many electric kettles maintain temperature for 30 to 60 minutes, useful for second cups.
- **Descaling interval:** Monthly in hard-water regions, every three months elsewhere.
- **Bloom ratio:** Roughly 2 grams of water per gram of coffee for the initial wetting pour.
- **Pour-over flow rate:** Skilled pourers deliver 4 to 6 grams of water per second during pulse pours.
- **Wattage:** Electric kettles range from 1000 to 1500 watts; higher wattage means faster heat-up but no advantage in pour quality.
## Frequently Asked Questions
### Can I make pour-over with a regular kettle?
Technically yes, but the result will be uneven. A standard kitchen kettle pours too wide and too fast for the gentle, controlled wetting that pour-over depends on, and the final cup will show channels, dry spots, and bitter edges from over-extracted center grounds. A gooseneck is not optional once you taste the difference.
### Is an electric kettle worth the premium over stovetop?
For most brewers, yes. Variable temperature control alone justifies the cost because it lets you match the water to the bean. PID stability is a further upgrade for light roasts and competition-grade brewing but is not strictly required for excellent home pour-over.
### How important is the handle balance?
More important than buyers usually realize. A long pour can take 3 to 4 minutes, and any wrist tension transmits to the stream. A well-balanced handle keeps the kettle feeling neutral throughout, which keeps your pour steady. Try the kettle full of water before buying if possible.
### Will a copper kettle make my coffee taste different?
The water itself does not pick up meaningful copper if the kettle is tin-lined. Some tasters report that copper kettles heat the water slightly more evenly, which can affect extraction, but the difference is subtle and most blind taste tests find it negligible. Copper is mostly an aesthetic and tactile choice.
### How much water should a kettle hold for one cup of pour-over?
A typical V60 brew uses 250 grams of water plus enough headroom in the kettle for steam and easy pouring. A 0.6-liter kettle handles this comfortably; a 1.0-liter kettle gives margin for two cups in a row. Anything smaller than 0.5 liters gets impractical for most brewers.
## Related Articles
- [Coffee Scales: Why 0.1g Precision Transforms Your Brew](/books/coffee-equipment-essentials/page/coffee-scales-why-01g-precision-transforms-your-brew)
- [Water for Coffee: Chemistry, TDS, and Filtration](/books/water-chemistry-for-coffee/page/water-for-coffee-chemistry-tds-and-filtration)
- [French Press: The Complete Immersion Brewing Guide](/books/french-press-complete/page/french-press-the-complete-immersion-brewing-guide)
- [Cold Brew Coffee: Method, Ratios, and the Science of Slow Extraction](/books/cold-brew-complete/page/cold-brew-coffee-method-ratios-and-the-science-of-slow-extraction)
- [Coffee Grinder Burr Geometry: Conical vs. Flat](/books/grinder-encyclopedia/page/coffee-grinder-burr-geometry-conical-vs-flat-why-it-matters)
- [AeroPress: The Travel Brewer's Complete Guide](/books/aeropress-complete/page/aeropress-the-travel-brewers-complete-guide)
- [Coffee Roasting Levels: Light, Medium, Dark](/books/coffee-science-chemistry/page/coffee-roasting-levels-light-medium-dark-and-why-it-matters)
## Buy Authentic Puerto Rico Coffee
A gooseneck kettle is only as good as the coffee you brew through it. Puerto Rico's mountain-grown Arabica from the central cordillera — Yauco, Adjuntas, Lares, Jayuya, Maricao — is the kind of careful, honest single-origin that rewards careful pouring with sweetness, body, and a finish that lingers. Order direct from the farms at PuertoRicoCoffeeShop.com, freshly roasted and shipped to your door.
Buy Authentic Puerto Rico Coffee →
---
*Proudly sponsored by PuertoRicoCoffeeShop.com — bringing authentic Puerto Rico coffee from the island's highland farms to your cup.*